My name is Denis and I created this blog to talk about music production as a topic, drop some knowledge on tips for mixing/mastering and to keep the producers out there inspired and creative. If you would like to keep up with me outside of the blog, I will leave my social links at the bottom of this blog.
Anybody can produce amazing beats, but what separates you from the rest of the producers is your mix. It is very important that you constantly practice this skill as the greater the quality you have, the more your beats will attract artists online and would want to eventually work with you.
In this step by step guide I will share the techniques I personally use in order to get the best sound quality out of my beats.
Get Organized
Before we start the mixing process, It is helpful to get each sound from your channel rack onto its own mixer track. This will help you individually control each sound and stay organized.
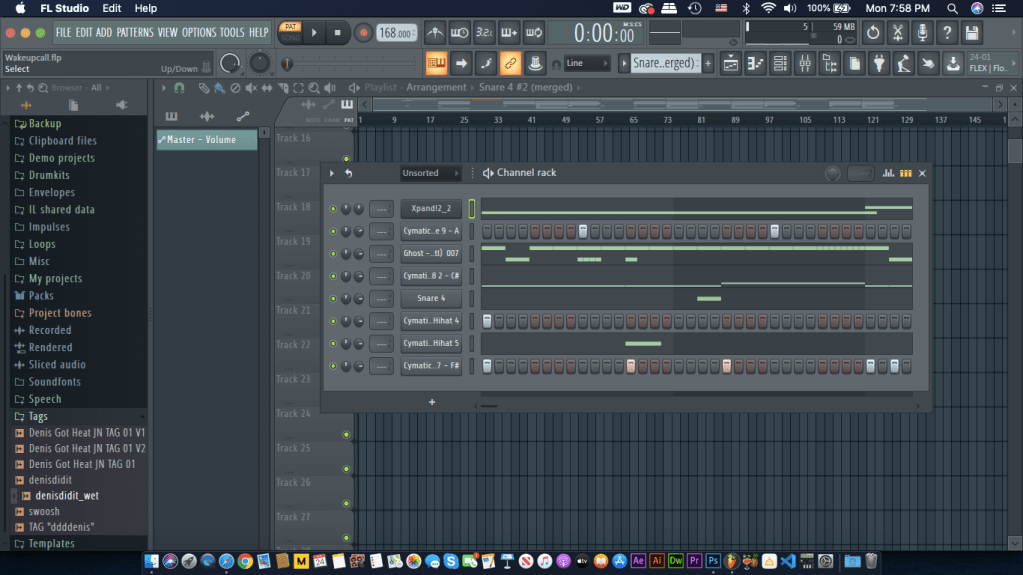
In order to get every individual sound onto its own mixer track the fast way, go to your channel rack (F6 on keyboard) and click once on the neon green-outlined box beside your first pattern.
All of your patterns should be highlighted.
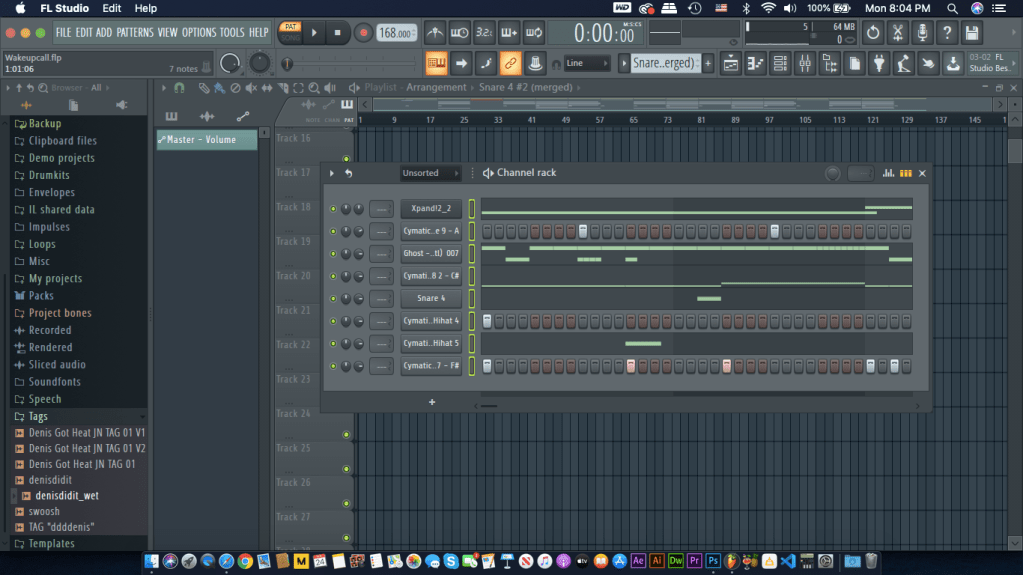
Switch over to your mixer panel (F9 on keyboard) to paste your patterns individually onto their own mixer track. Personally to stay organized, on the mixer panel I like to separate the drum elements from the melodic ones. With that in mind, I start pasting my drum elements starting on mixer track 5 and leaving mixer tracks 1-4 for melodic or fx elements.
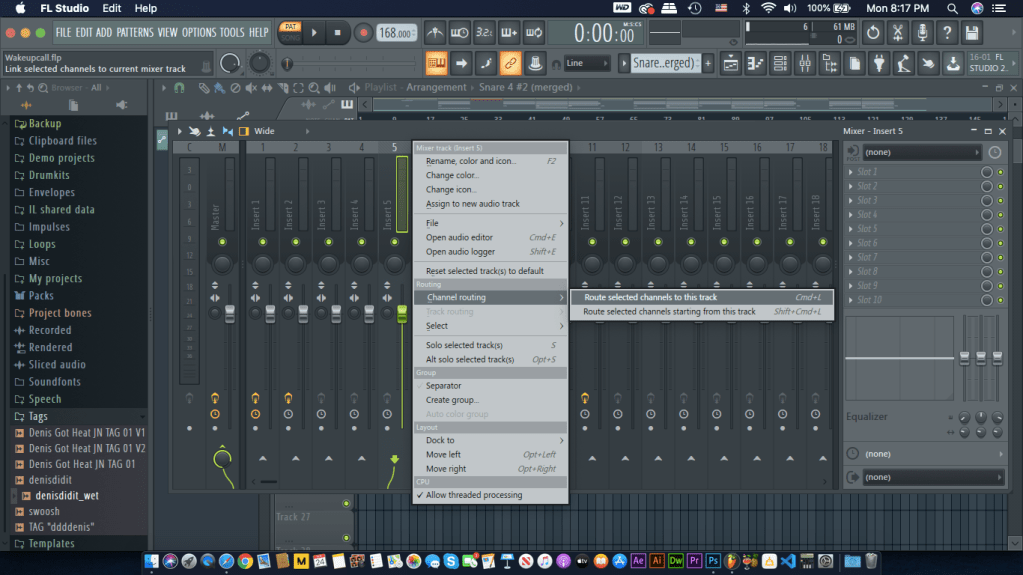
Starting on track 5, Right click on track 5, hover over ‘Channel Routing’ and click on ‘Route selected channels starting from this track’ or (SHIFT + CMND/CTRL + L)
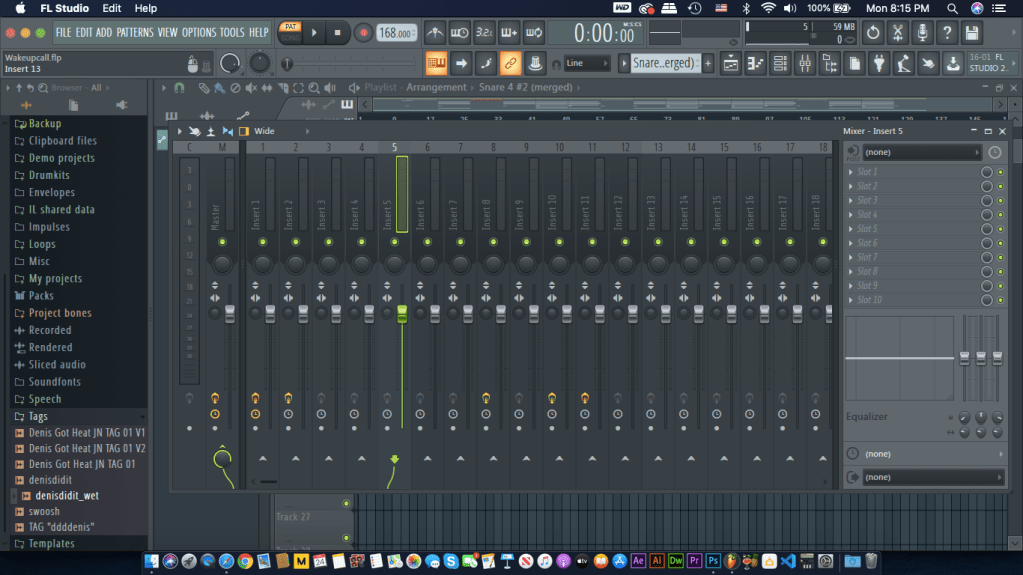
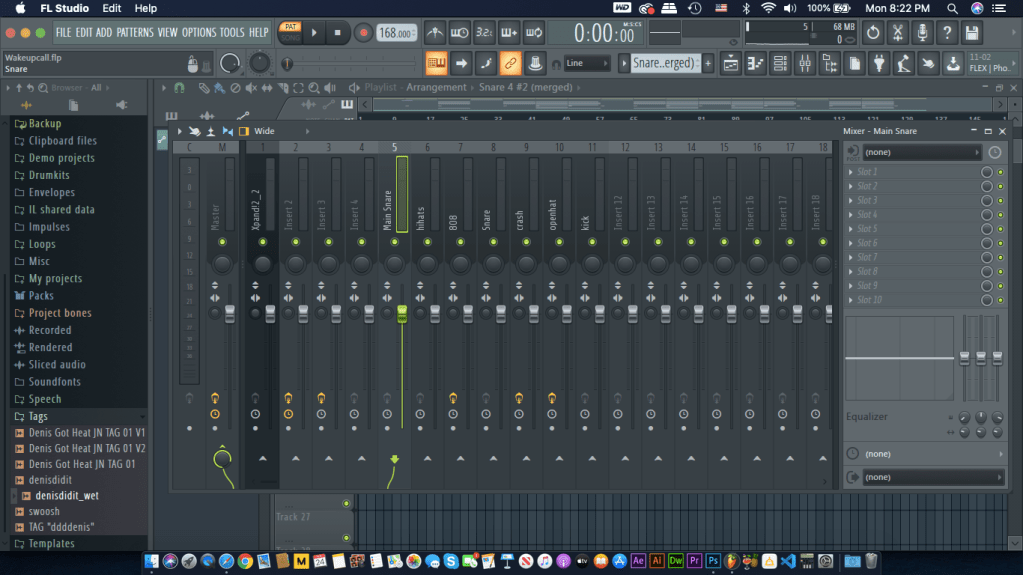
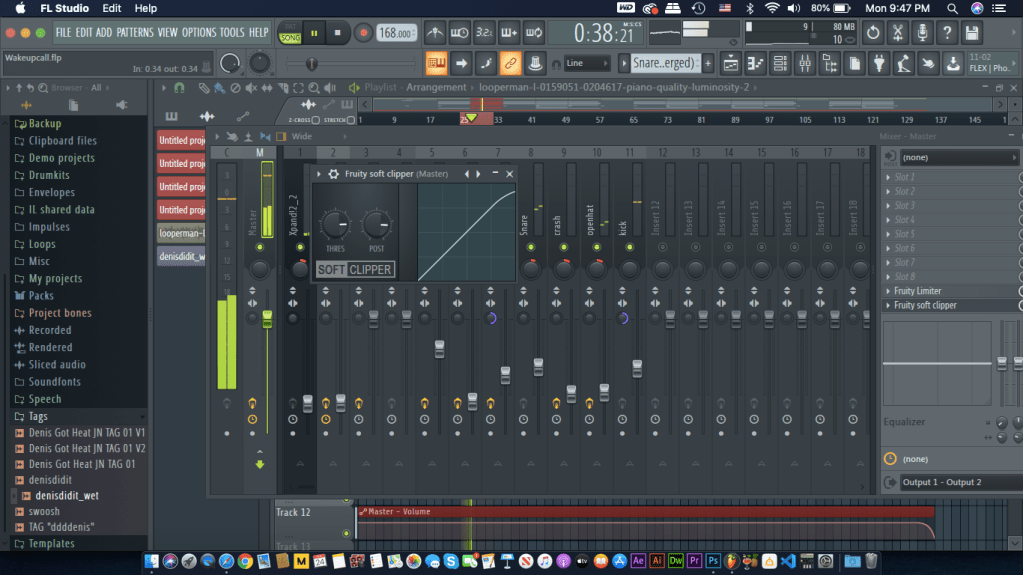
Your Mixer track should like the image below. I named each mixer track to the sound it correlates to, so it won’t be confusing later on. To name a mixer track, select a track and press F2 on your keyboard. Notice that track, “Xpand!2_2” is placed on mixer track 1. That is because “Xpand!2_2” is a melodic pattern or in this beat a guitar preset.
Getting rid of unwanted frequencies
Now that we got organization out of the way, let’s start on the actual mixing. Using Fl Studio’s own Equalizer (Parametric EQ 2) or any other equalizer at your disposal, go through each channel rack and get rid of harsh frequencies that collide with other sounds in your beat.
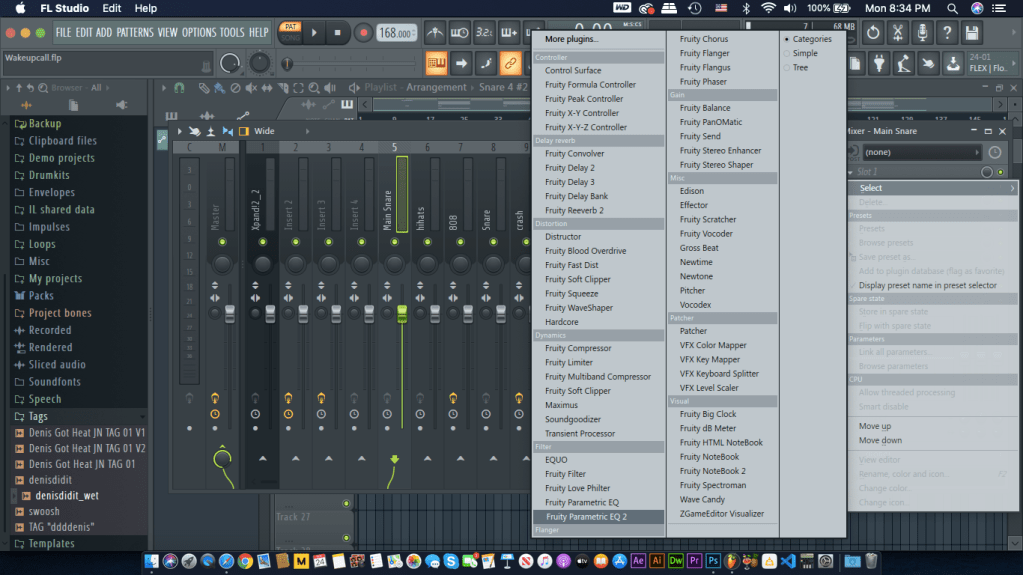
Open up The EQ by selecting the mixer track and opening up your plug-in list by clicking the drop down arrow on the track’s slots.
Eq-ing Snares or Claps
TIP: right click on the neon green dot below your tracks name to solo out that track and mute out the rest of the sounds to easily hear each sound.
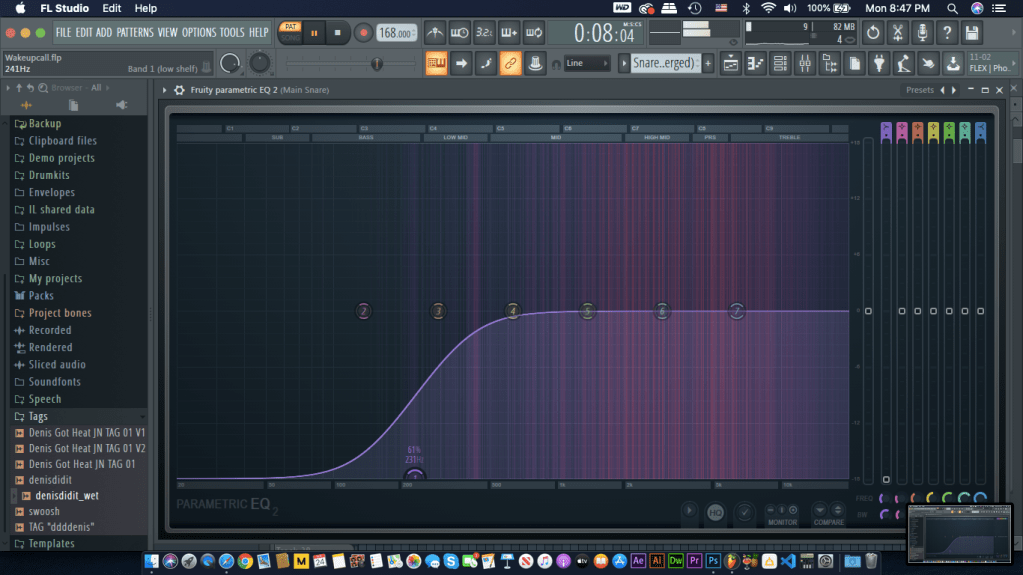
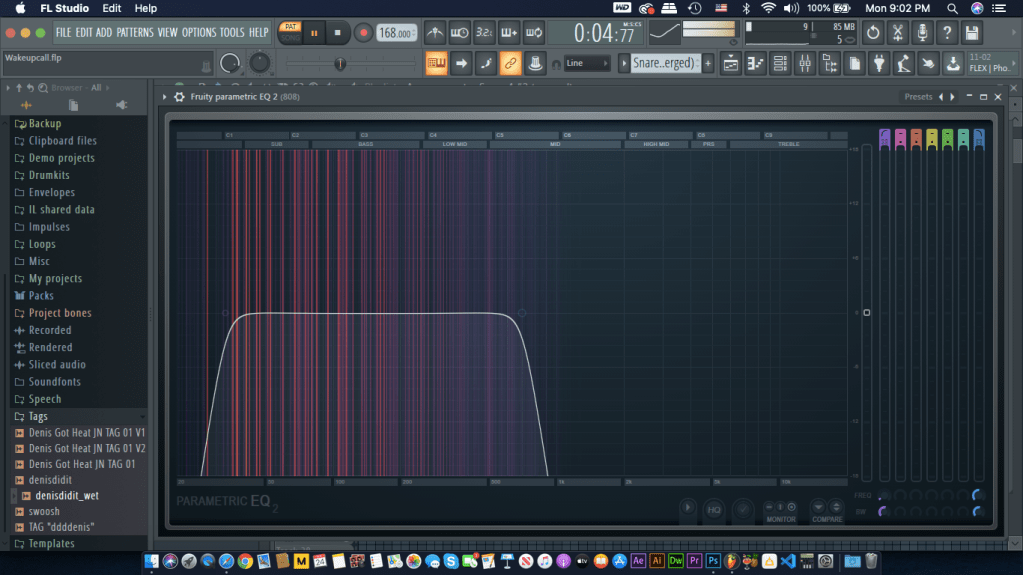
When I EQ my snares or claps I cut the low end of the sound to around 230hz. this cuts out any low-end that may collide with the bass while still maintaining the mid to high frequencies for the snare or clap to sound crisp.
Eq-ing Hi-hats
EQ-ing the 808/Bass
Now for the fun part, The 808’s. I start off by creating a highpass filter at around 30hz and a lowpass filter at 715hz.
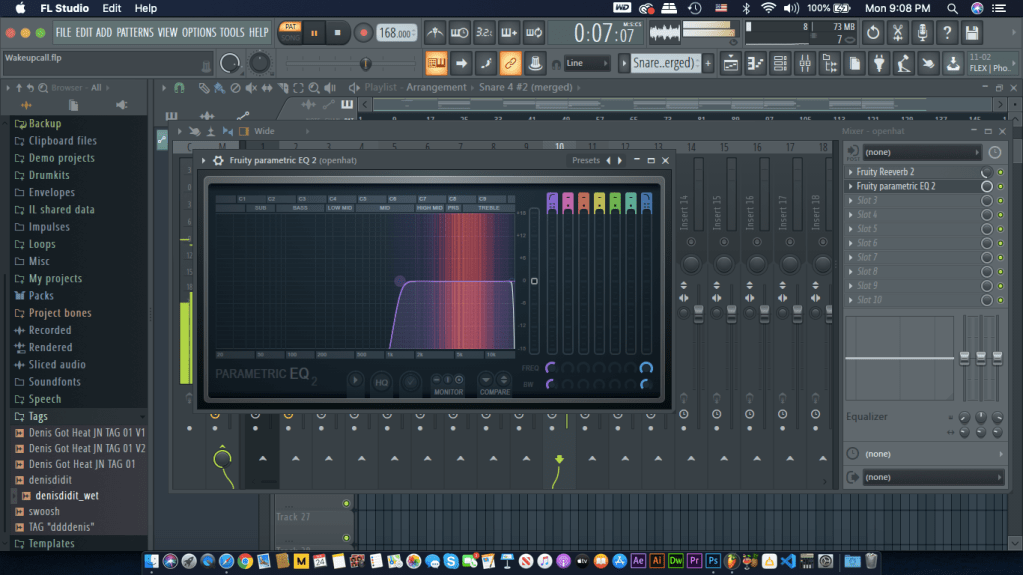
EQ-ing Crash/Openhats
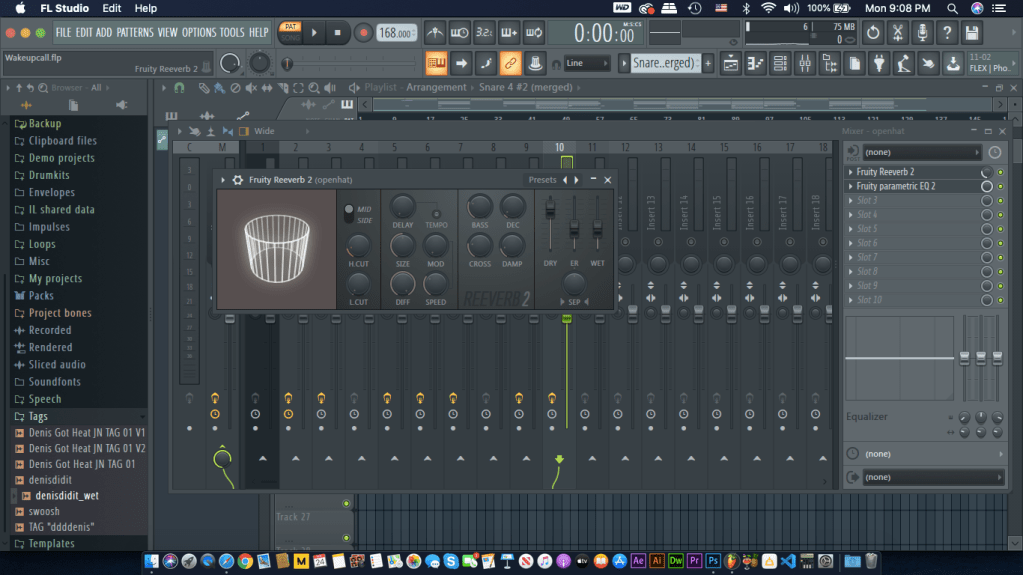
Since crashes and open hats have similar frequencies as the hi hats you can filter them the same way. A technique I use is to add a little of ambiance or reverb on the open hats and crashes to create depth in the drum pattern.
EQ-ing the Kick
Surprisingly, I do not Eq my kick. Why? Because I want to my kick to knock through the mix since these drum samples have a range of low and hi end frequencies. However, I do level the kick so it won’t peak over 0.0db.
EQ-ing the Melodies
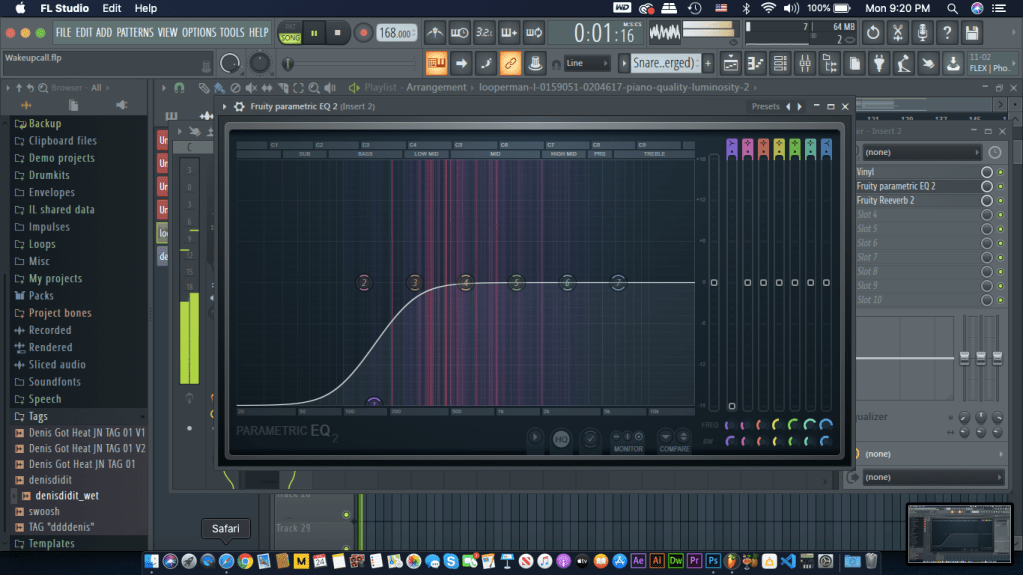
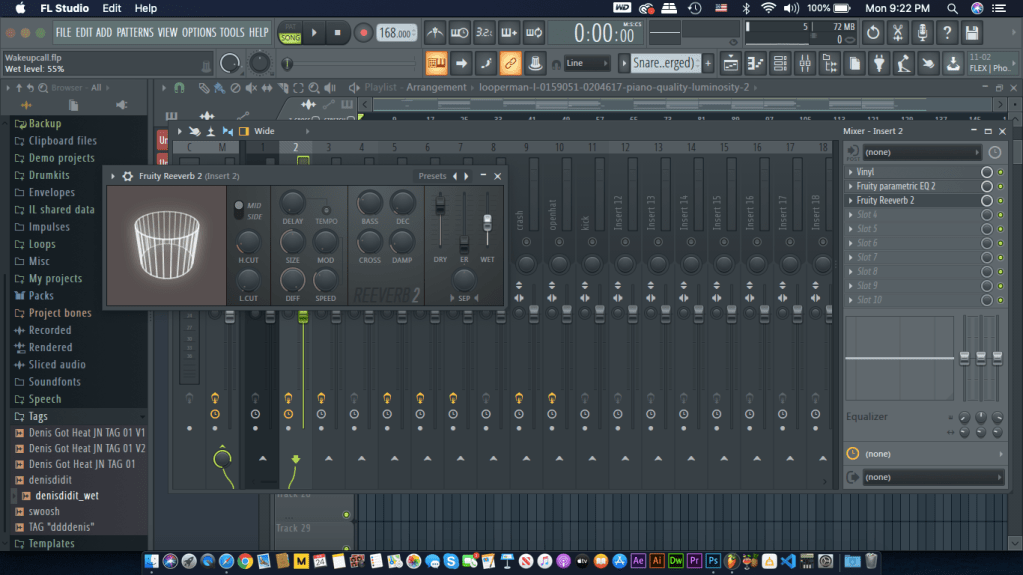
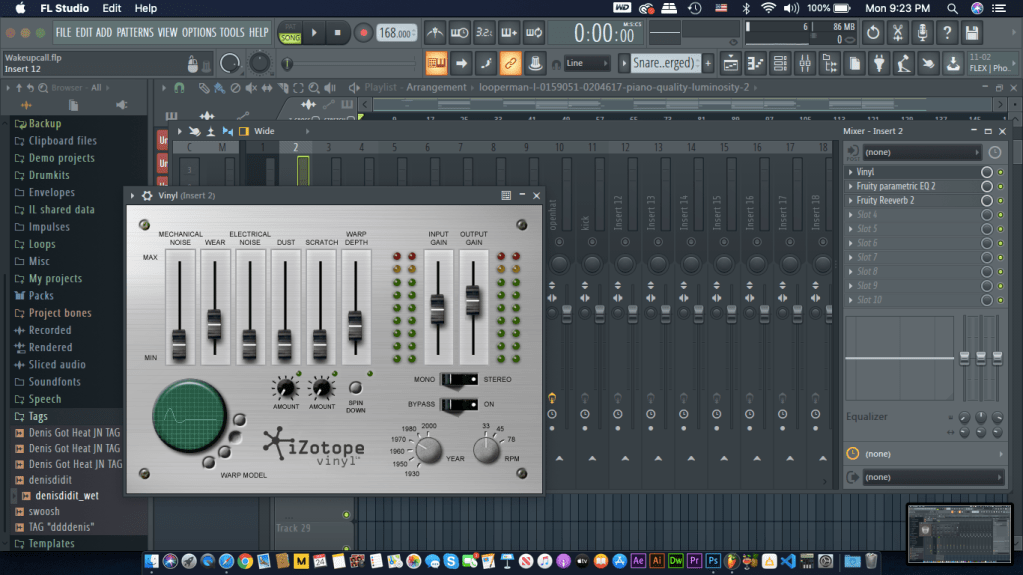
Another important element in music is the melody. In this beat I have a Piano sample and a Guitar pattern I created with a preset. EQ-ing melodies vary from sound however the idea is the same. You want the melodies to have little low end so it won’t collide with the bass. In this beat, the Piano has low-end and high frequencies. I filtered some of the low-end while still getting enough bass that won’t collide. I also add reverb to create more space in the track. The piano in this beat has an effect called vinyl which manipulates the sound to sounding old school/vintage creating a nice texture.
Leveling and Panning
Leveling is placing each sound at certain volume (Decibel/db) so the whole beat is balanced and no sound overpowers another or peaks over 0.0 db. Panning is what makes a sound come from the left or right in stereo. When mixing, keep in mind that you are technically creating a template for the artist to record on. Make room for the artist to lay their vocals by limiting the amount of sounds in the found in the middle of the mix. Typically the main vocals in a track sit in the middle of the song. Both of these techniques are important to the mix. It is what makes the beat sound good and cohesive.
Snare/Clap – -18db 10% left pan
hi hats – -27db 15-20% pan
accent snares or percussion – -18 to -21db either left or right pan 10-15%
808/bass – -18db keep middle of the mix
openhats/crashes – -27 to -24db 20% right pan
kick – -15db middle of mix
melodies – -33 – 30db pan either left or right 10-15%
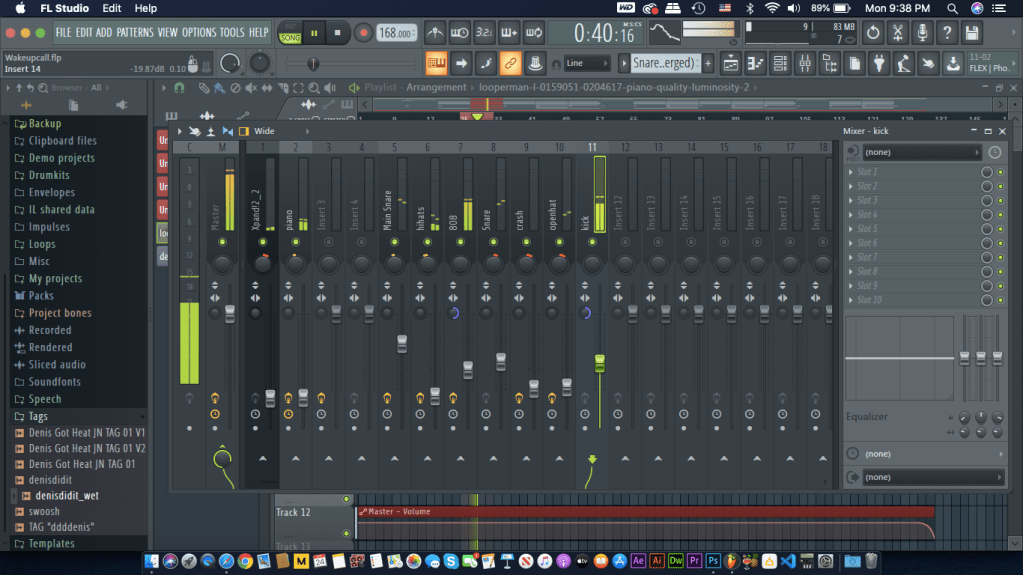
For this beat this is how the mixer panel looks like after the leveling, panning and EQing.
Make it sound louder!
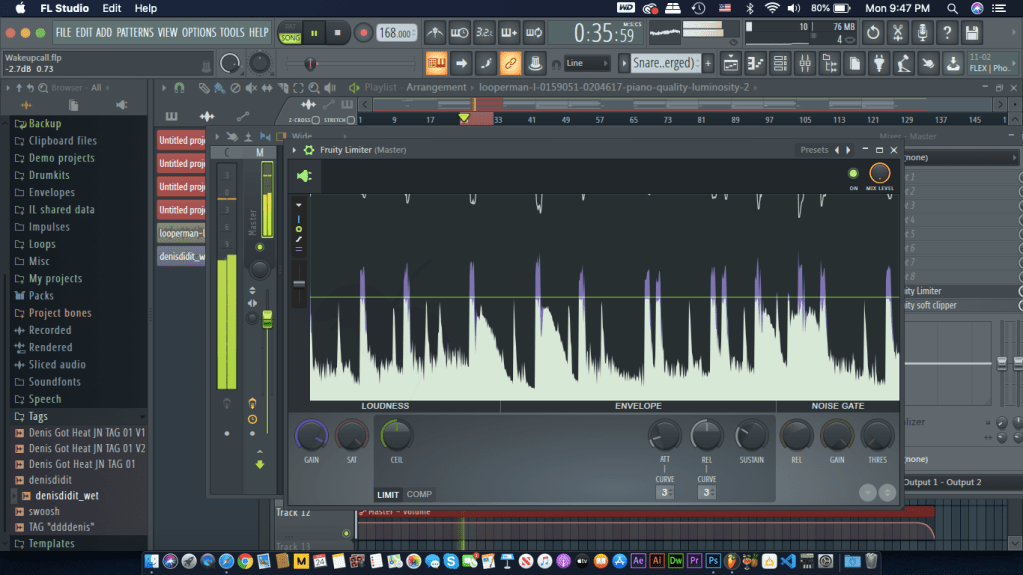
The final step in this mixing process is to make the whole beat sound loud and good. Head over to the MASTER track and open up “fruity limiter” Fruity limiter will help increase the volume in the overall track. Start by raising the purple gain knob by 15db and decreasing the green ceiling knob by -1db. This ensures the beat reaches its full potential volume without peaking past 0.0db. Next open up a soft clipper. This helps from maintaining all the individual sounds on the track stay below 0.0db.
Your beat is ready to be published sounding clean and crisp!
If you found this guide helpful, like and share this post and comment below any feedback! I will respond to any comments.
Since I received my first smartphone in freshman year of high school, I became familiar with social media and the creative things you can find. I was very into soccer related posts on social media such as instagram and at the time, vine. I became interested in soccer edits where people would upload 7 second soccer highlights with background music in sync with the video. I took my cheap android phone and did my research on video editing apps and how to access these highlights. After much thought and research I gave it a shot. I would download highlights from player performances to amazing goals and edit it them in sync with either edm or rap music. My first ever post on social media was a 7 second compilation on famous soccer legend, Ronaldinho showcasing his best skills and goals. At first, I did not care about how much engagement I received, this was just something new I wanted to try. Soon I would upload constantly after school and started to see followers and likes on vine. This was my first experience on being creative digitally,
Fast forward to a year later I gained 10K plus followers on vine and I was very proud of how far I came, but during this time vine was soon to be an extinct platform. I switched to instagram and I liked it because it was becoming popular and I also liked how video posts were at 15 seconds compared to the 7 seconds on vine. Posting content on instagram made me love editing so much that I wanted to expand my knowledge in software instead of apps and to challenge myself to make edits no one has seen before. When I got my first laptop on my 15th birthday I was instantly eager to see what this machine can do editing wise. I downloaded the trial version of Final Cut Pro X and tried my best to master this software. Once I got familiar with FCPX I wanted to know more so I downloaded Adobe After Effects. This by far was the most fun to use software because it is more advanced and the effects made in AE were top notch. Couple years later after posting regularly, in 2017, I reached my greatest milestone yet. 50k+ followers on instagram and my top viewed video was 150k views.
In senior year of high-school, I started to think more about my future. once i was done with high-school I wanted to do something fun, something creative digitally. I enrolled in the graphic design program in 2018 since during that time I took a digital media class and I loved it. While I already applied, I also found a new passion, Music Production. I was fascinated by how rap instrumentals were the core of a hit song everybody loves. Till this day I still create and upload beats to my website, dedicating my free time to practicing my craft and market my music. I am now in my last semester of the graphic design program and I’ve enjoyed it. After this program I plan to work on music, video editing/production, and create designs for clients. I believe freelancing will give me the opportunity to do what I love best.
This is my story to how I am in this program. I have to thank social media for how much it revolutionized our daily lives and giving me the opportunity to try something new that has become a passion to me.